“Stains on your upholstery? Don’t just sit there and watch! The longer you wait, the harder the battle will be to get rid of food stains on your couches using wipes. Time is of the essence when dealing with these pesky intruders in the inconspicuous spot, a battle involving food and directions. Understanding your leather upholstery material is key in this battle against stains and pet hair. Pillows and wipes are also important tools in this task. Is it leather, fabric or vinyl? Each one demands a different cleaning approach.
Professional cleaning services can be a godsend, especially in the battle against stubborn hair and leather stains. But let’s face it – they’re not always within reach. So what do you do with your hair when you’re left to your own devices? You roll up your sleeves and get down to business! This guide will help you navigate through this tricky terrain and come out victorious.
Decoding Upholstery Cleaning Codes
Ever noticed those cryptic letters on your furniture’s tags? They’re not just random scribbles but a secret language, the manufacturer’s cleaning codes. These codes are more than important; they’re the key to maintaining your upholstery in top-notch condition.
Let’s get down to brass tacks and decode these cleaning codes:
- W: This code implies that you can use water-based cleaners. So, if you spill some coffee on your ‘W’ coded couch, no need to panic! Just grab a water-based cleaner and gently dab away.
- S: The ‘S’ stands for solvent cleaners. Water is a big no-no for these fabrics. Instead, opt for a dry-cleaning detergent or mild dry spot cleaner.
- WS: A combination of both worlds! You can either use water-based or solvent-based cleaners for this type of upholstery.
- X: This one is tricky. ‘X’ means professional cleaning only. Trying DIY methods could risk damaging the fabric.
You might think, “Why bother with these codes? Can’t I just clean my furniture any way I want?” Well, ignoring these codes is like playing Russian roulette with your upholstery. Using the wrong cleaning method can lead to discoloration, shrinkage or even irreversible damage!
Now that we’ve decoded the mystery of cleaning codes let’s talk about why they matter so much:
- Longevity: Following the appropriate code ensures that your upholstery lasts longer.
- Preserving appearance: Using correct cleaning methods maintains the color and texture of your fabric.
- Preventing Damage: Ignoring cleaning code instructions may lead to permanent damage.
So next time when you spot a stain on your upholstery don’t forget to check its secret language – its cleaning code – before embarking on any DIY stain removal mission!
DIY Techniques for Spot Cleaning Upholstery
Homemade Solutions to the Rescue
Got a pesky spot on your beloved upholstery? Fear not! You can whip up some homemade solutions using everyday household items. One popular go-to solution is vinegar mixed with water. This combo works wonders on most stains. Alternatively, you can use baking soda mixed with water, which is especially effective for stubborn spots that refuse to budge.
- Vinegar Solution: Mix one cup of white vinegar with one cup of warm water.
- Baking Soda Mixture: Combine two tablespoons of baking soda with a small amount of water to make a paste.
The Sneaky Spot Test
Before you get all gung-ho and start attacking the spot, it’s crucial to test your chosen cleaning solution on an inconspicuous spot first. Why? Well, different upholstery materials react differently to various substances. You wouldn’t want to accidentally discolor or damage your upholstery in the process of trying to clean it, right?
Find a hidden area on your upholstery (like the backside or underneath) and apply a small amount of your cleaning solution. Wait for it to dry and check if there’s any discoloration or damage. If everything looks good, you’re ready to move onto the actual spot cleaning.
Blot Don’t Rub!
Now that you’ve got your tested-and-approved homemade solution at hand, it’s time for some action! But remember one golden rule: always blot — don’t rub — the stain.
Why blotting? Simple! Rubbing could potentially spread the stain further into the fabric fibers making it even harder to remove later on. So take a clean cloth or sponge, dip it into your cleaning solution and gently blot from outside towards center of the stain until it starts lifting off.
Remember:
- Always test first.
- Use homemade solutions like vinegar or baking soda mixtures.
- Blot – don’t rub!
With these DIY techniques in mind, tackling those unsightly spots on your upholstery won’t seem so daunting anymore!
Effective Removal of Gum from Upholstery
Freezing the Gum
The first step in gum removal is to freeze it. It’s like putting a pause button on a sticky situation. You can use ice cubes, but for a more efficient method, grab a can of compressed air. This stuff is usually used for cleaning keyboards, but it works wonders on gum too.
- Hold the can upside down and spray onto the gum until it hardens.
- Wait for about 5 minutes to let the cold do its magic.
This freezing technique makes the gum less gooey and easier to handle.
Scraping Off The Gum
Now comes the part where you play dentist with your upholstery. But instead of teeth, you’re scraping off hardened gum without damaging the fabric underneath.
- Use a blunt knife or an old credit card for this task.
- Gently scrape off as much of the frozen gum as possible.
- Be careful not to pull at loose threads or push too hard that might damage the material.
Remember patience is key here – rushing may cause more harm than good!
Vacuum and Solvent Cleaning
After you’ve scraped off most of the gum, there might be some residue left behind. This is where our trusty vacuum comes into play:
- Run your vacuum over the area to pick up any small pieces.
- If there are still sticky spots left, it’s time for solvents.
There are commercial products specifically designed for removing residues from upholstery:
- Goo Gone
- WD-40
- Upholstery safe dry-cleaning solvent
Just remember: always test any product in an inconspicuous area first! We don’t want any unexpected color fading or fabric damage now, do we?
So there you have it folks! That’s how you remove that pesky piece of chewed-up bubblegum from your favorite couch or car seat without causing any collateral damage! Who knew dealing with such a sticky situation could be so cool (literally) and easy? Now go forth and enjoy your clean, gum-free upholstery!
Handling Beverage Stains on Upholstered Furniture
Immediate Blotting: Your First Line of Defense
Imagine you’re having a chill night, lounging on your couch with a glass of wine or a cup of coffee. Suddenly, oops! The beverage spills onto your upholstered furniture. What do you do? You blot it out immediately – that’s what!
Immediate blotting is the unsung hero in preventing set-in stains from beverages like wine and coffee. It’s all about acting quickly, not giving the liquid time to seep into the fabric fibers of your beloved couches. Here are some steps to follow:
- Grab a clean cloth or paper towel.
- Press it gently onto the spill area.
- Lift and repeat until no more liquid is absorbed.
Remember, blot don’t rub! Which brings us to our next point…
The “No Rubbing” Rule: Don’t Spread the Mess
Now, you might be tempted to give that stain a good scrubbing or rubbing – resist! Doing so can cause the stain to spread and further penetrate into your furniture’s upholstery.
Instead, continue blotting until there’s no more transfer of color onto your cleaning cloth. And hey, if you’ve got stubborn stains laughing at your face (we’re looking at you red wine), here’s where club soda comes into play.
Club Soda: Not Just for Drinking
Club soda isn’t just for sipping alongside your favorite alcohol in the living room; it’s also an underrated cleaning agent for treating wine and coffee stains on upholstered furniture.
Here’s how to use club soda effectively:
- Pour a small amount of club soda directly onto the stained area.
- Let it fizz up (it’s working its magic).
- Gently blot with a clean cloth until the stain lifts.
Voila! You’ve successfully handled beverage stains on upholstered furniture using everyday items from around your home.
So remember folks, when life throws beverage spills at you – immediate blotting is key; avoid rubbing or scrubbing actions; and never underestimate the power of club soda!
Preventing Pet Hair and Stains on Upholstery
Regular Grooming: Your First Line of Defense
Hey, pet parents! Ever sat down on your couch only to stand up covered in a layer of pet hair? Or maybe you’ve found an unexpected stain from your furry friend on your favorite chair? You’re not alone. One way to tackle this is by establishing regular grooming routines for your pets.
- Brush them daily. This can significantly minimize shedding onto furniture. Think about it, the more hair you catch with the brush, the less ends up on your precious upholstery.
- Invest in a good quality pet brush that really gets into their fur and removes those loose hairs before they have a chance to migrate to your couch or pillows.
Pet-Friendly Covers: A Preemptive Strike
Another trick up our sleeve is using pet-friendly upholstery covers or throws. Here’s why they’re awesome:
- They protect fabric and leather surfaces from both hair and potential stains.
- They are easy to remove and wash, making clean-up a breeze.
- They come in various designs so you can still keep your living room looking stylish.
It’s like having a protective shield for your furniture!
Training Pets: The Long-Term Solution
Now let’s talk about training pets not to climb onto upholstered furniture. Yes, it might take some time (and patience), but it’s totally worth it.
- Start by providing comfortable alternatives for them – think plush pet beds or mats.
- Use positive reinforcement when they use their designated spots instead of the furniture.
- Be consistent with the rules – if they’re not allowed on the couch, make sure everyone in the house knows and follows through.
In essence, we’re teaching our pets that there are better options than our upholstered pieces where they can relax without us fretting over potential messes.
So there you have it! These simple steps can go a long way in preventing pet hair and stains on upholstery while keeping our beloved pets happy too! It’s all about finding that balance between maintaining cleanliness around the house while also ensuring our furry friends feel loved and comfortable at home.
Tips for Removing Set-in Upholstery Stains
Steam Cleaning Magic
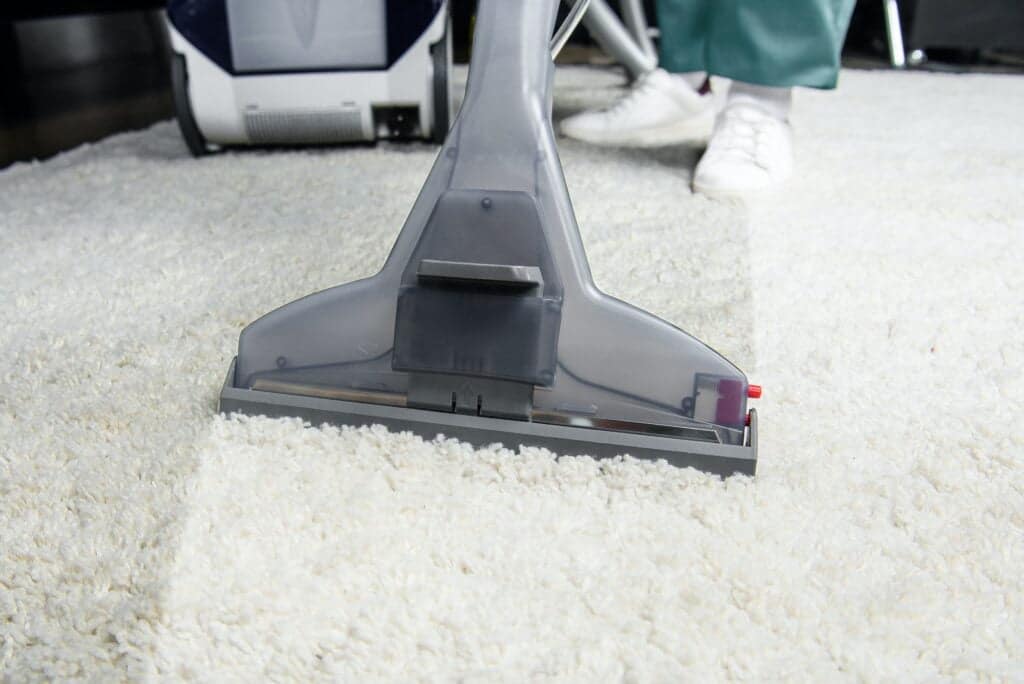
Ever wondered why your grandmother’s couch still looks brand new? The secret is steam cleaning. This method uses hot water under high pressure to penetrate deep into the upholstery fabric. It effectively loosens and lifts stubborn stains, even those that have settled in over time. Here’s how you do it:
- Vacuum the upholstery to remove loose dirt.
- Pre-treat the stain with a suitable upholstery cleaner.
- Fill the steam cleaner with water and turn it on.
- Once heated, run the steam cleaner over the stain.
Remember, steam cleaning isn’t just about getting rid of visible stains. It also kills bacteria, dust mites, and other allergens lurking within your furniture.
Enzymatic Cleaners: Your New Best Friend
Next up in our arsenal of stain-busting tools are enzymatic cleaners. These aren’t your ordinary cleaning products; they contain special enzymes that break down organic matter like food spills or pet messes.
Here’s a quick rundown of how these cleaners work:
- They latch onto the molecules making up the stain.
- The enzymes break these molecules down into smaller pieces.
- These pieces are then easy to wipe away or vacuum up.
Enzymatic cleaners might sound like something out of a science lab, but they’re actually widely available and easy to use.
Patience Is Key
Finally, let’s talk about patience – an often overlooked factor in tackling set-in stains on upholstery. You might be tempted to scrub harder or apply more product when you don’t see immediate results, but this can often do more harm than good.
Instead:
- Apply your chosen treatment
- Allow it ample time to work (as indicated by its instructions)
- Gently blot (don’t rub!) away at the stain
- If necessary, repeat these steps until satisfied with results
Remember Rome wasn’t built in a day; similarly, removing tough stains from your beloved furniture may take multiple rounds of treatment too!
Clean, Maintain, and Prevent Future Stains
So you’ve made it through the mess! You’ve decoded those cryptic cleaning codes, tackled spot cleaning like a pro, and even managed to evict that pesky gum from your favorite chair. Not to mention handling those drink spills and pet hairs like a boss. But hey, don’t rest on your laurels just yet. There’s more to upholstery care than just stain removal.
Keeping your furniture looking fresh is an ongoing gig. It’s all about regular maintenance and preventing future stains. Remember, prevention is better than cure! So go forth with confidence, keep these tips in your back pocket and show those stains who’s boss!
Ready for more? Dive deeper into our blog for more home care tips and tricks. Your upholstery will thank you!
FAQS
How often should I clean my upholstered furniture?
Regular cleaning can extend the life of your upholstered furniture. A good rule of thumb is to vacuum it every two weeks and deep clean it once or twice a year.
What’s the best way to prevent stains on my upholstery?
Preventing stains starts with regular cleaning and using slipcovers or throws if necessary. Also consider applying a fabric protector spray which can repel liquids.
Can I use any DIY technique for all types of upholstery?
Nope! Always check the manufacturer’s instructions first as some materials may require specific cleaning methods.
Is professional upholstery cleaning worth it?
Absolutely! While DIY methods can handle minor stains, professionals have specialized equipment that can remove stubborn spots without damaging your furniture.
How do I handle stubborn set-in stains?
For tough stains that won’t budge, consider hiring a professional cleaner or using a specialized stain remover designed for upholstery.

